Source Code
Refer to the
powersync-swift repo on GitHubAPI Reference
Full API reference for the SDK
Example Projects
Gallery of example projects/demo apps built with PowerSync and Swift
Changelog
Changelog for the SDK
Kotlin -> Swift SDK
The PowerSync Swift SDK makes use of the PowerSync Kotlin SDK with the API tool SKIE under the hood to help generate and publish a Swift package. The Swift SDK abstracts the Kotlin SDK behind pure Swift Protocols, enabling us to fully leverage Swift’s native features and libraries. Our ultimate goal is to deliver a Swift-centric experience for developers.SDK Features
- Real-time streaming of database changes: Changes made by one user are instantly streamed to all other users with access to that data. This keeps clients automatically in sync without manual polling or refresh logic.
- Direct access to a local SQLite database: Data is stored locally, so apps can read and write instantly without network calls. This enables offline support and faster user interactions.
- Asynchronous background execution: The SDK performs database operations in the background to avoid blocking the application’s main thread. This means that apps stay responsive, even during heavy data activity.
- Query subscriptions for live updates: The SDK supports query subscriptions that automatically push real-time updates to client applications as data changes, keeping your UI reactive and up to date.
- Automatic schema management: PowerSync syncs schemaless data and applies a client-defined schema using SQLite views. This architecture means that PowerSync SDKs can handle schema changes gracefully without requiring explicit migrations on the client-side.
Installation
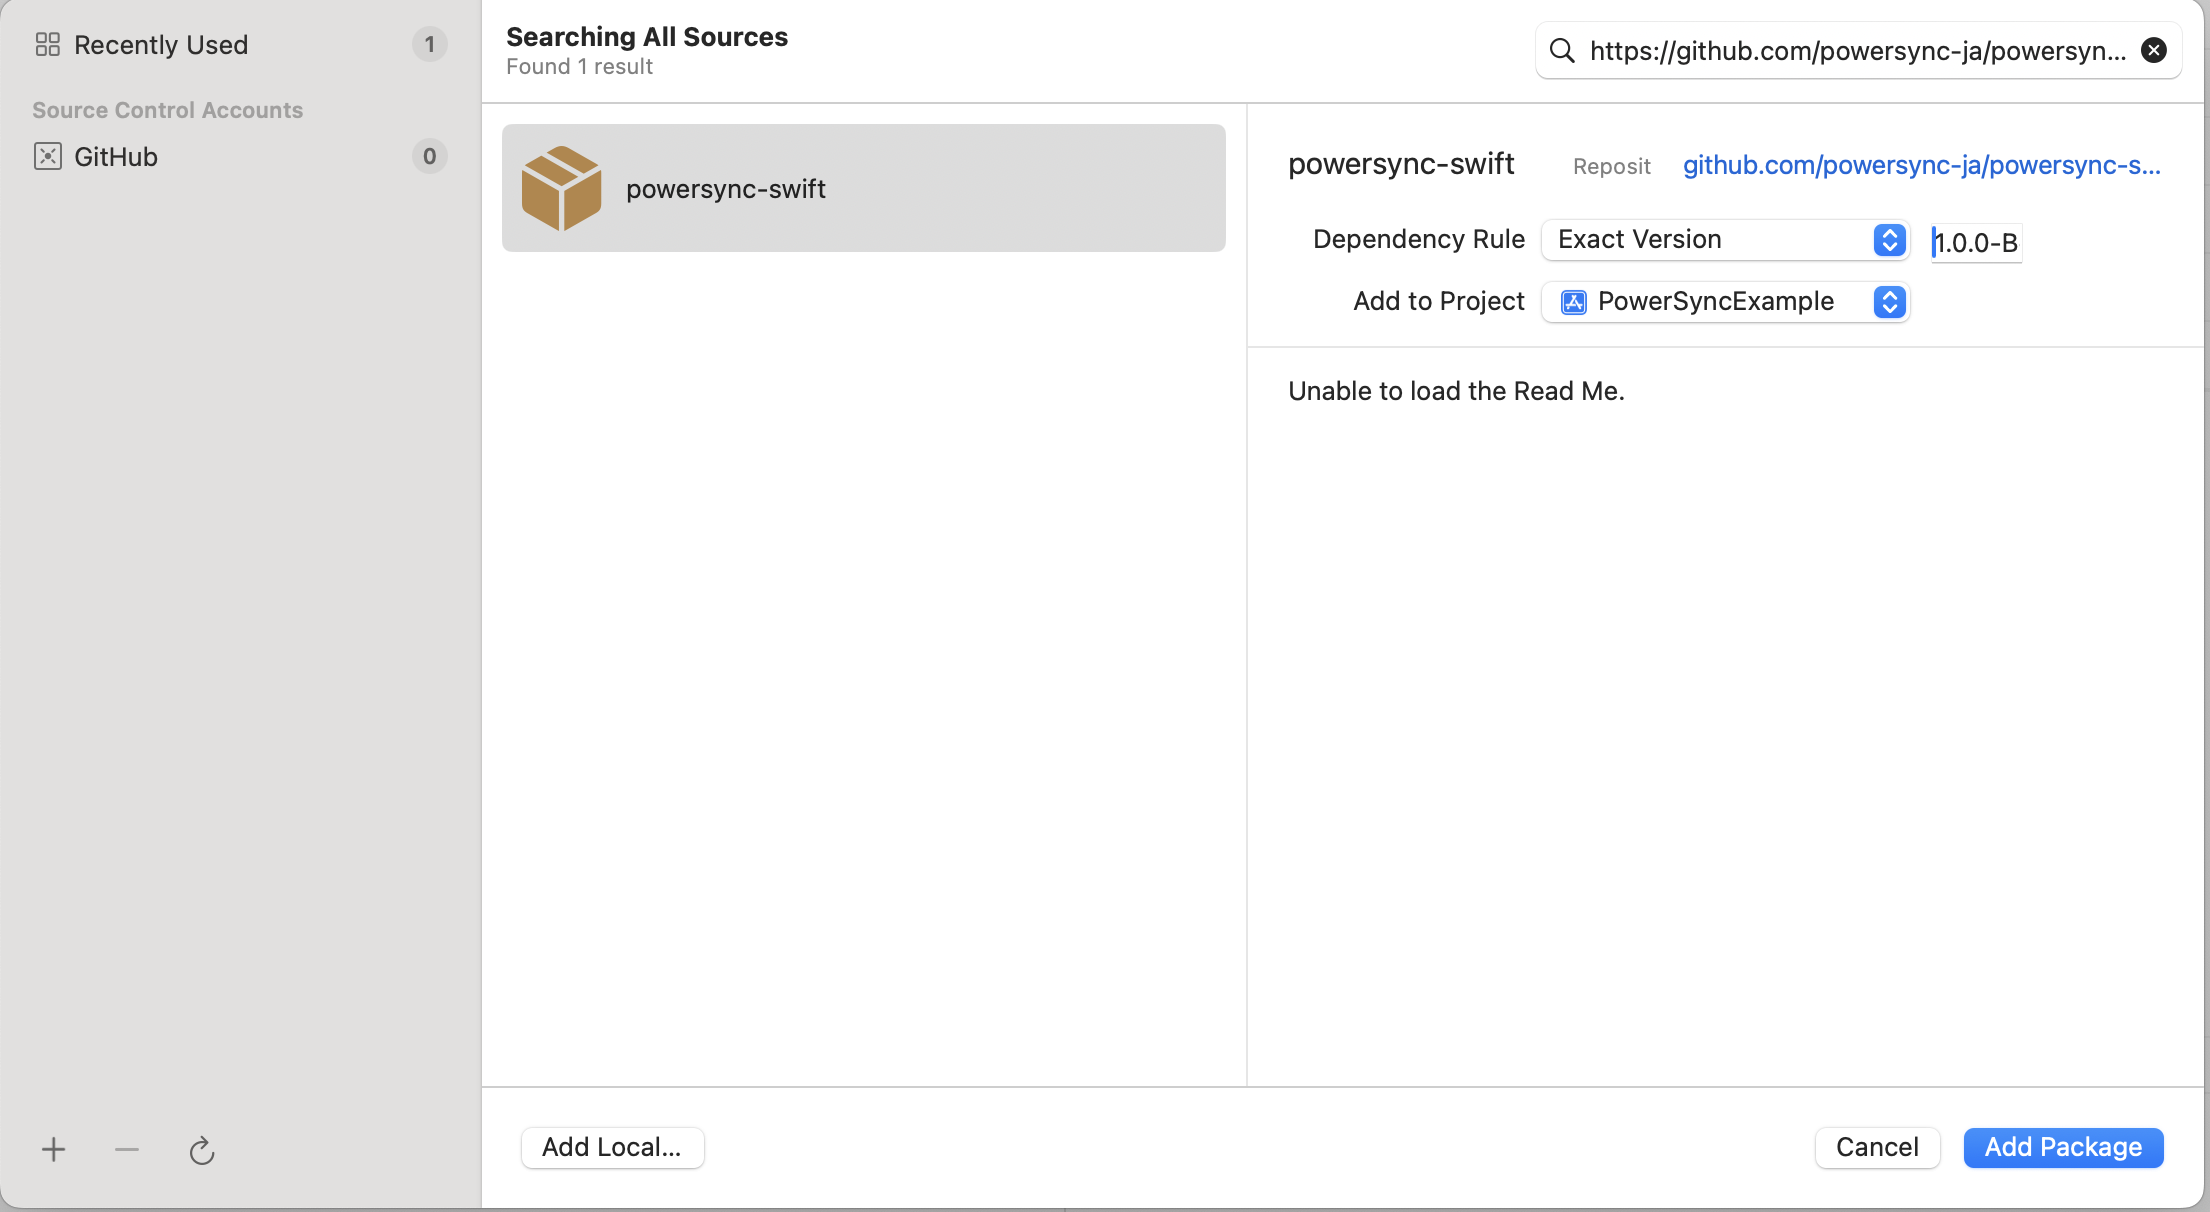
You can add the PowerSync Swift package to your project using eitherPackage.swift or Xcode:
- Package.swift
- Xcode
Getting Started
Before implementing the PowerSync SDK in your project, make sure you have completed these steps:- Signed up for a PowerSync Cloud account (here) or self-host PowerSync.
- Configured your backend database and connected it to your PowerSync instance.
- Installed the PowerSync SDK.
1. Define the Schema
The first step is defining the schema for the local SQLite database, which is provided to thePowerSyncDatabase constructor via the schema parameter. This schema represents a “view” of the downloaded data. No migrations are required — the schema is applied directly when the PowerSync database is constructed.
The types available are text, integer and real. These should map directly to the values produced by the Sync Rules. If a value doesn’t match, it is cast automatically.
Example:
Note: No need to declare a primary key
id column, as PowerSync will automatically create this.2. Instantiate the PowerSync Database
Next, you need to instantiate the PowerSync database — this is the core managed database. Its primary function is to record all changes in the local database, whether online or offline. In addition, it automatically uploads changes to your app backend when connected. Example:3. Integrate with your Backend
Create a connector to integrate with your backend. The PowerSync backend connector provides the connection between your application backend and the PowerSync managed database. It is used to:- Retrieve an auth token to connect to the PowerSync instance.
- Apply local changes on your backend application server (and from there, to your backend database)
-
PowerSyncBackendConnectorProtocol.fetchCredentials- This is called every couple of minutes and is used to obtain credentials for your app’s backend API. -> See Authentication Setup for instructions on how the credentials should be generated. -
PowerSyncBackendConnectorProtocol.uploadData- Use this to upload client-side changes to your app backend. -> See Writing Client Changes for considerations on the app backend implementation.
Using PowerSync: CRUD functions
Once the PowerSync instance is configured you can start using the SQLite DB functions. The most commonly used CRUD functions to interact with your SQLite data are:- PowerSyncDatabase.get - get (SELECT) a single row from a table.
-
PowerSyncDatabase.getOptional - get (SELECT) a single row from a table and return
nullif not found. - PowerSyncDatabase.getAll - get (SELECT) a set of rows from a table.
- PowerSyncDatabase.watch - execute a read query every time source tables are modified.
- PowerSyncDatabase.execute - execute a write (INSERT/UPDATE/DELETE) query.
Fetching a Single Item ( PowerSync.get / PowerSync.getOptional)
Theget method executes a read-only (SELECT) query and returns a single result. It throws an exception if no result is found. Use getOptional to return a single optional result (returns null if no result is found).
Querying Items (PowerSync.getAll)
ThegetAll method executes a read-only (SELECT) query and returns a set of rows.
Watching Queries (PowerSync.watch)
Thewatch method executes a read query whenever a change to a dependent table is made.
Mutations (PowerSync.execute)
Theexecute method executes a write query (INSERT, UPDATE, DELETE) and returns the results (if any).
Configure Logging
You can include your own Logger that must conform to the LoggerProtocol as shown here.DefaultLogger supports the following severity levels: .debug, .info, .warn, .error.